How to Set Up Your Facebook Profile: A Comprehensive Guide, Setting up a Facebook profile is an essential step after creating your account. Indeed, Your profile is your digital identity on Facebook, allowing friends and connections to learn more about you. A well-organized profile not only helps you connect with others but also makes it easier for people to find you. In this guide, we’ll walk you through the step-by-step process of setting up your Facebook profile, from adding a profile picture to filling out detailed information about yourself.
Step 1: Accessing Your Facebook Profile
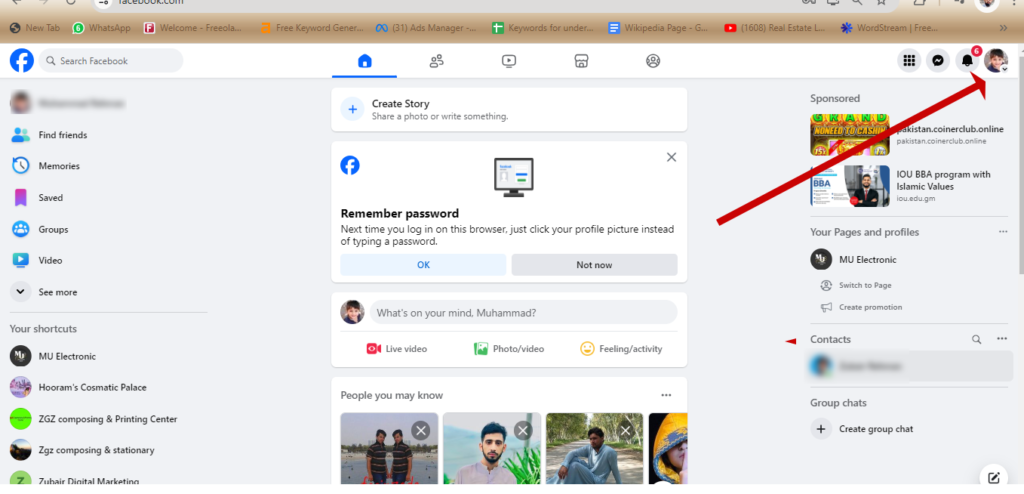
Once you’ve logged into your Facebook account, you can begin setting up your profile. To access your profile:
On the left side of the Facebook dashboard, you’ll see your name at the top. Alternatively, your name may appear on the right side near the nine dots icon. Click on your name to open your profile page.
Step 2: Adding a Profile Photo and Cover Photo
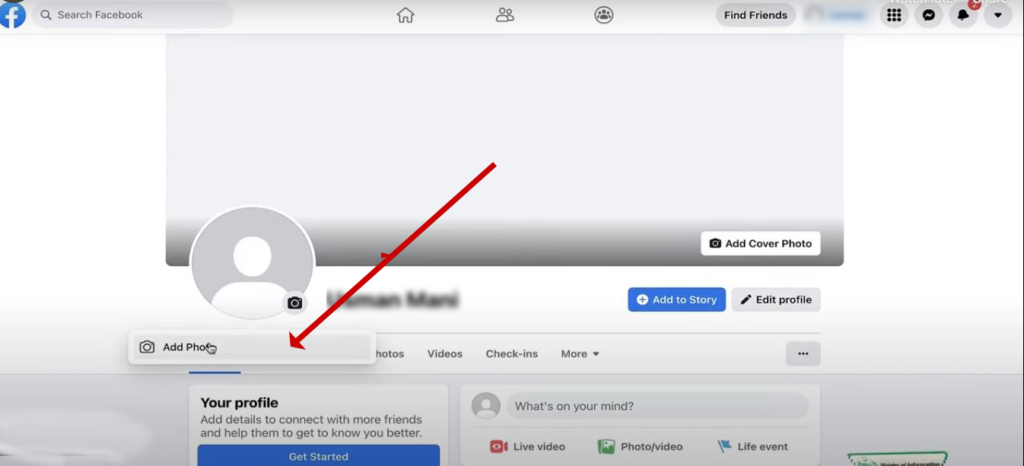
Your profile photo is a key part of your Facebook identity, so it’s important to choose a picture that represents you well. Here’s how to add or update your profile photo:
- Adding a Profile Photo:
- Click on the camera icon located on your profile photo space.
- A small window will open with an option to “Update Profile Picture.”
- Click on “Update Photo” and choose the desired photo from your computer.
- Once the photo is uploaded, you can zoom in, zoom out, and crop it as needed.
- Optionally, you can add a description to your profile photo, which will be published as a post.
- Adding a Cover Photo:
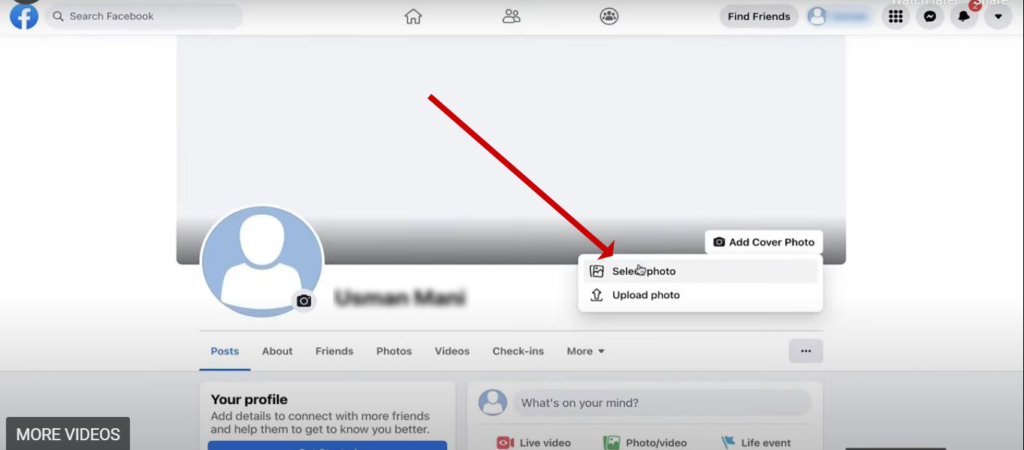
- Click on “Add Cover Photo” located at the top of your profile page.
- A window will pop up with options to “Select Photo” or “Upload Photo.”
- Choose the desired photo from your computer and upload it.
- Adjust the cover photo by moving it up or down to fit the space perfectly.
Step 3: Exploring Your Profile Dashboard
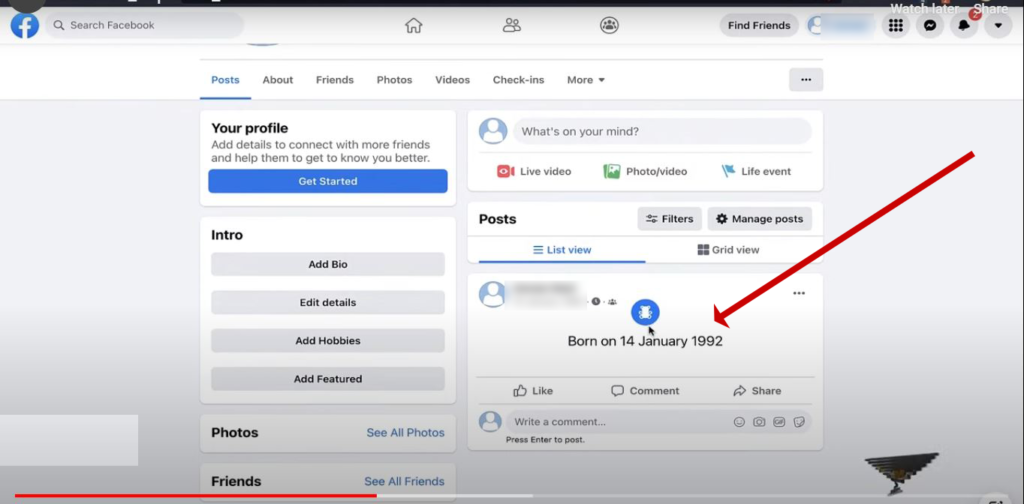
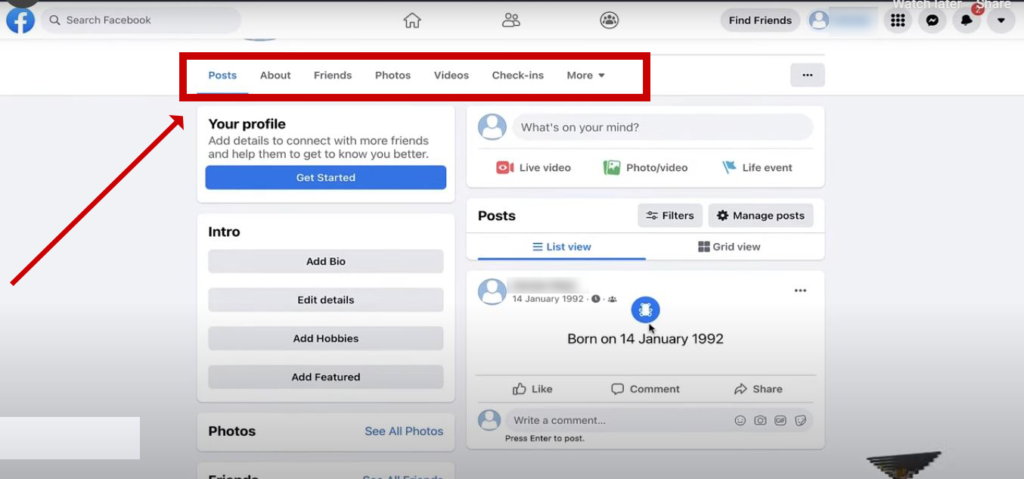
After setting up your profile and cover photos, you’ll notice various sections on your profile page:
- Posts: On the right side of your profile, you’ll see your recent posts.
- Intro, Photos, and Friends: On the left side, you’ll find the “Intro” section, which provides a brief overview of your profile, along with your photos and friends list.
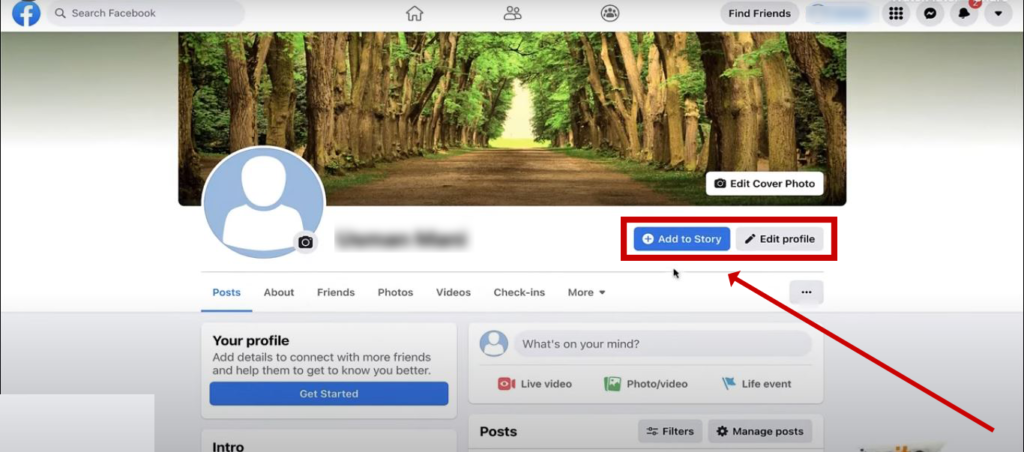
At the top of your profile, you’ll see your profile photo, and next to it, buttons like “Add to Story” and “Edit Profile.”
- Add to Story: Use this feature to share short-lived content that disappears after 24 hours.
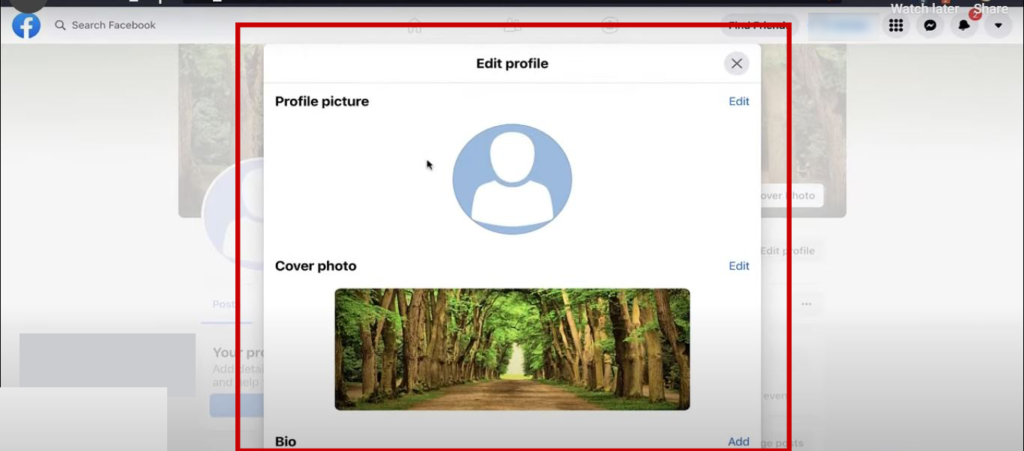
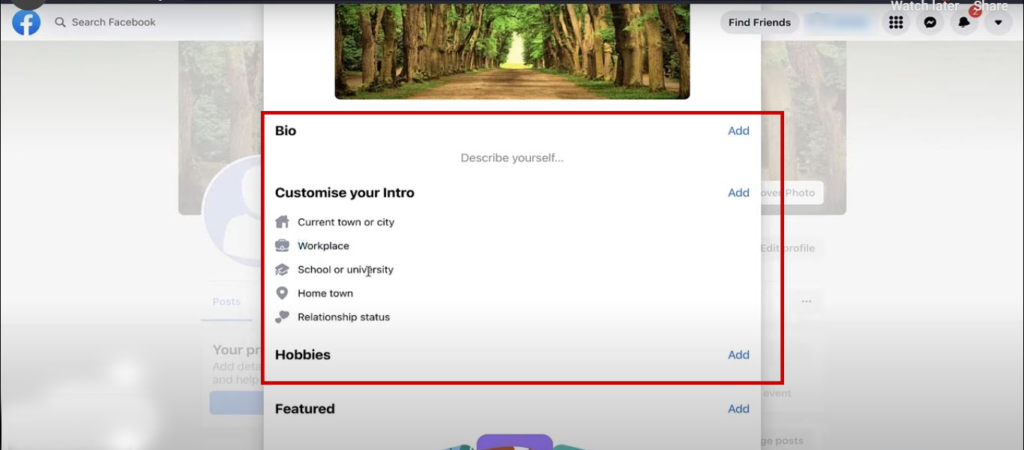
- Edit Profile: This button allows you to update various aspects of your profile, including your profile picture, cover photo, and personal information such as your current city, workplace, school, hometown, and relationship status. You can also add hobbies, interests, and other details here.
Step 4: Filling Out Your Profile Information
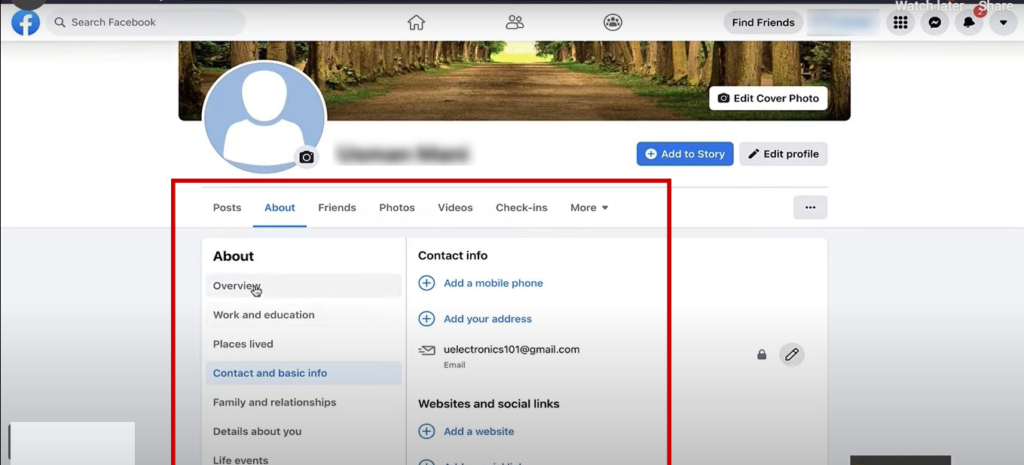
To complete your profile, you’ll need to provide more detailed information about yourself. This information can be accessed and edited under the “About” tab, which includes several sections:
- Overview:
- Here, you can add your workplace, including the company name, position, location, and description.
- If you are currently working at the company, check the box “I currently work here.”
- You can also add your educational background, including high school and university, as well as your current city, hometown, and relationship status.
- Work and Education:
- This section allows you to enter and update your work history and educational background.
- Places Lived:
- Add your current city and other locations where you’ve lived.
- Contact and Basic Info:
- Include your contact details, such as your mobile number and address.
- In the “Basic Info” section, you can add languages spoken, religious views, political views, and edit your gender and birthday.
- Family and Relationships:
- Here, you can add family members who also use Facebook. If your family members are on Facebook, you can link to their profiles to indicate your relationship.
- Details About You:
- This section allows you to add personal details, such as a brief bio or description of yourself.
- You can also include a name pronunciation audio clip, add nicknames, and list your favorite quotes or interests, such as blood donation.
- Life Events:
- Highlight significant life achievements, such as graduating from university, getting married, or starting a new job.
Step 5: Finalizing Your Profile Setup
After you’ve added all the desired information, As a result, your Facebook profile will be fully set up and ready for others to view. Remember, it’s up to you to decide what information to include. You can choose to share as much or as little as you feel comfortable with. A well-rounded profile with a good mix of personal and professional information can help you connect with others more effectively.
Setting up a Facebook profile is an essential step to fully engage with the platform and its vast community. By following the steps outlined above, you can create a comprehensive and attractive profile that reflects who you are. Whether you’re connecting with old friends, making new ones, or establishing a professional presence,
your Facebook profile is your digital identity, and certainly, it’s important to make it as complete and accurate as possible.

2 Comments
Real Learning Blog
thank you brother