How to manage Facebook Page Basic and Advance Settings, how to manage a Facebook page effectively requires a solid understanding of both its basic and advanced settings. Whether you’re running a business, community group, or personal brand, configuring your Facebook page correctly is crucial for optimizing its performance and ensuring it meets your specific needs. Indeed, This guide will walk you through the essential aspects of setting up and managing your Facebook page, from basic information to advanced settings.
Basic Information and Settings
When you first create a Facebook page, one of the key areas you’ll interact with is the basic information and settings. As a result, these foundational elements allow you to customize your page. Moreover, they make it more accessible to your audience.
1. Page Name and Username
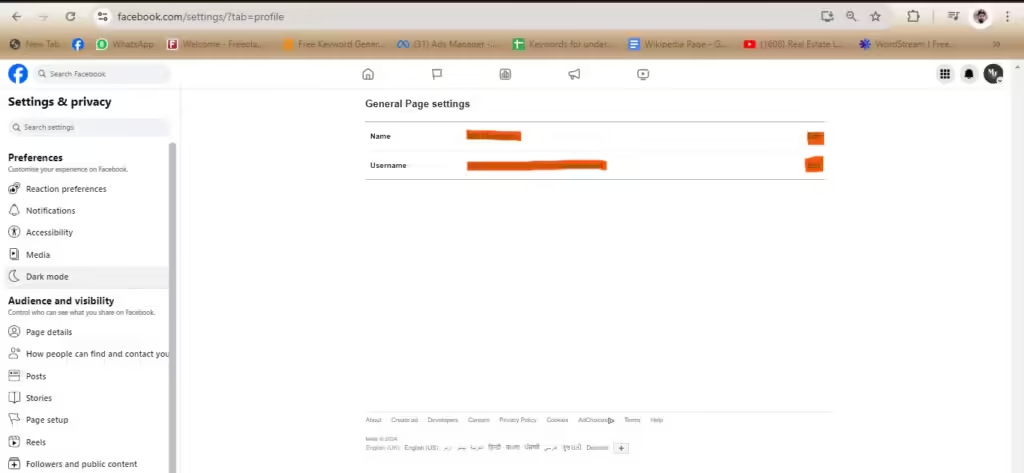
Your page name is a critical identifier for your brand or organization. Directly beneath the page name, Facebook provides the option to create a username. The username forms part of your page’s URL, making it easier for people to find and remember your page. Initially, the URL is a string of numbers, which isn’t easy to memorize. To create a custom username:
- Go to page profile
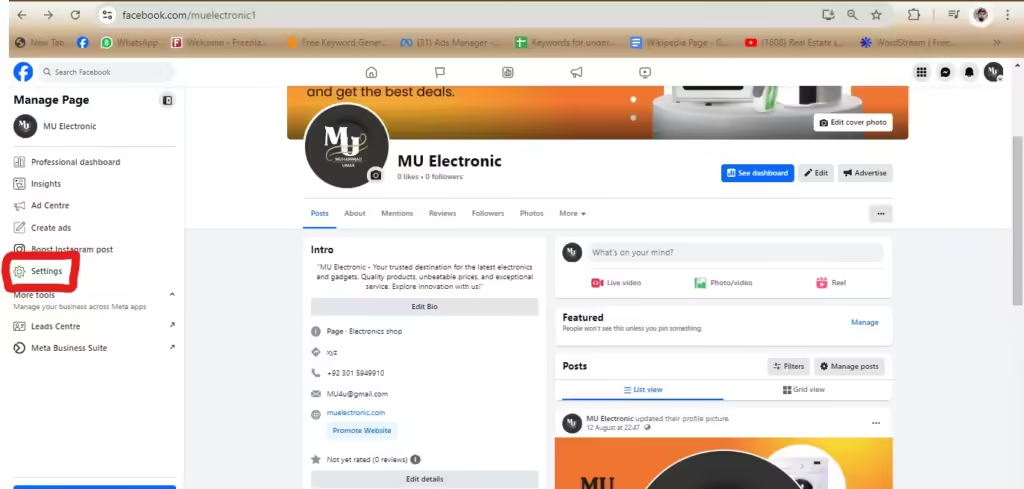
- Left side click on setting
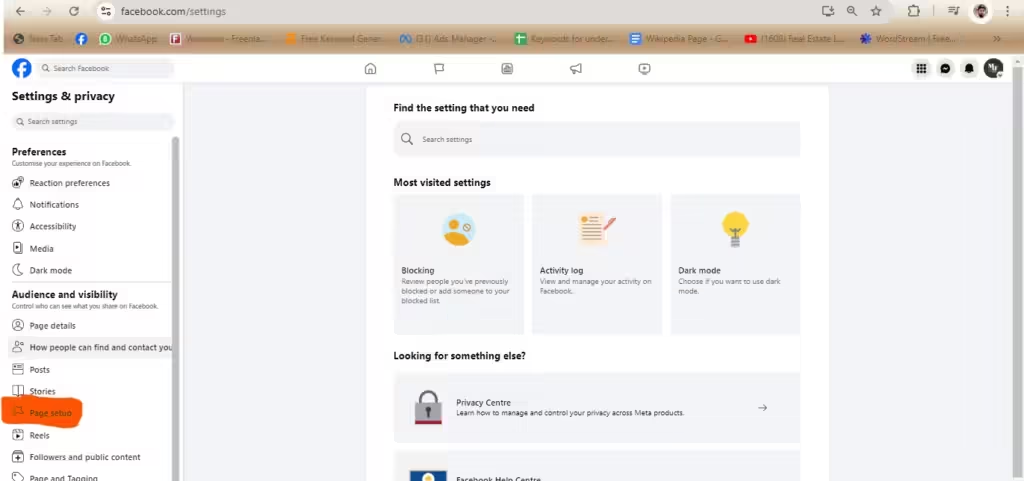
- Click page setting on left side
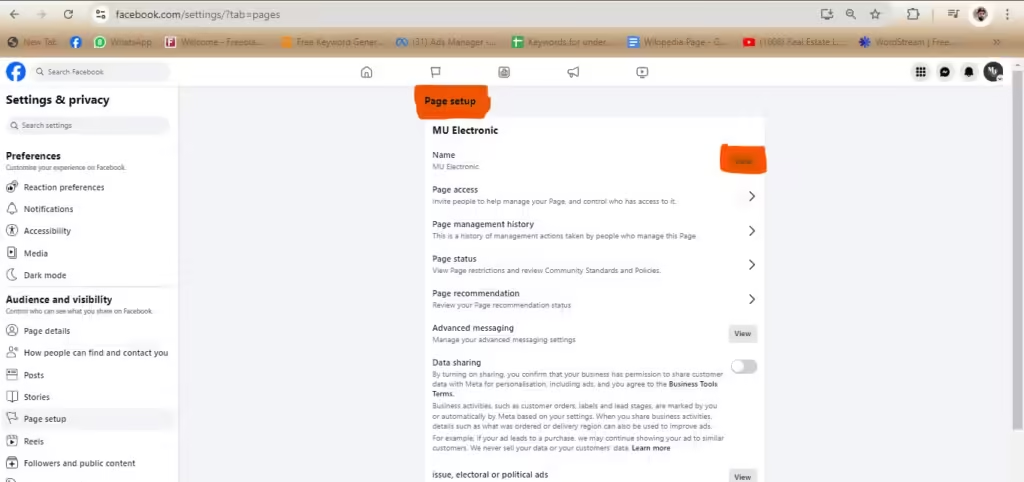
- Now click on Page Setup & Click on view
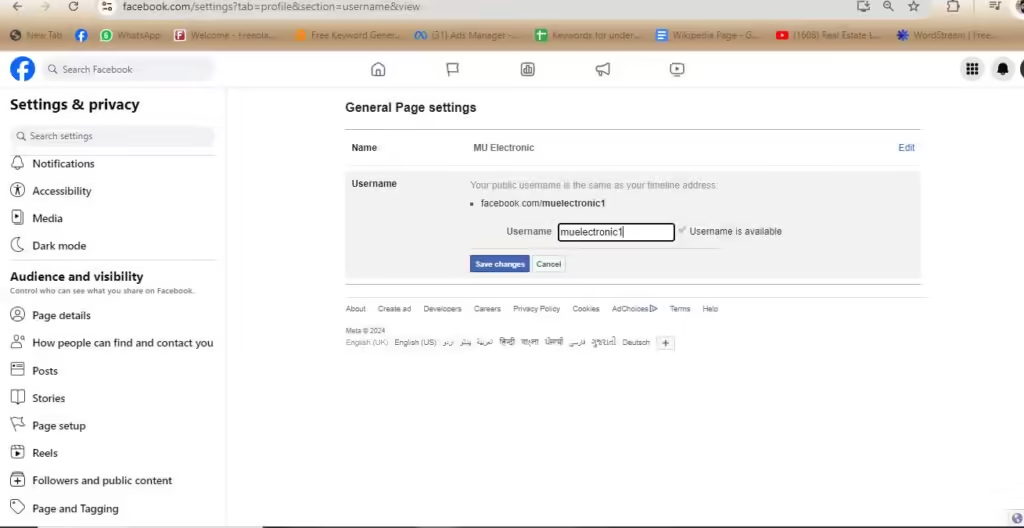
- Click on username edit
- Choose you username
- Ensure your chosen username is available, and then finalize it by clicking “Create.”
- Save changes
For example, if your page name is “MU Electronic,” you can set the username as “MUElectronic1,” which will update your URL to a more user-friendly format like facebook.com/MUElectronic1.
2. Action Buttons
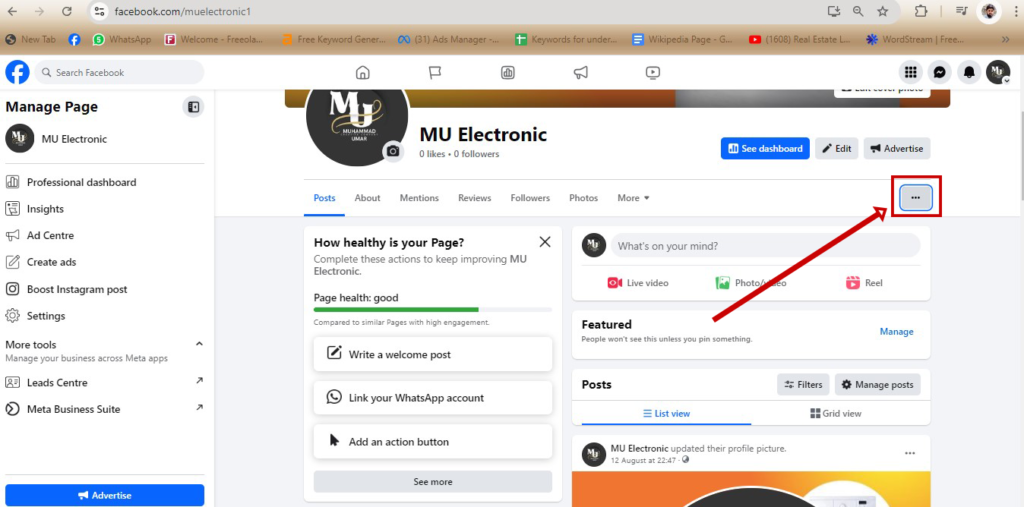
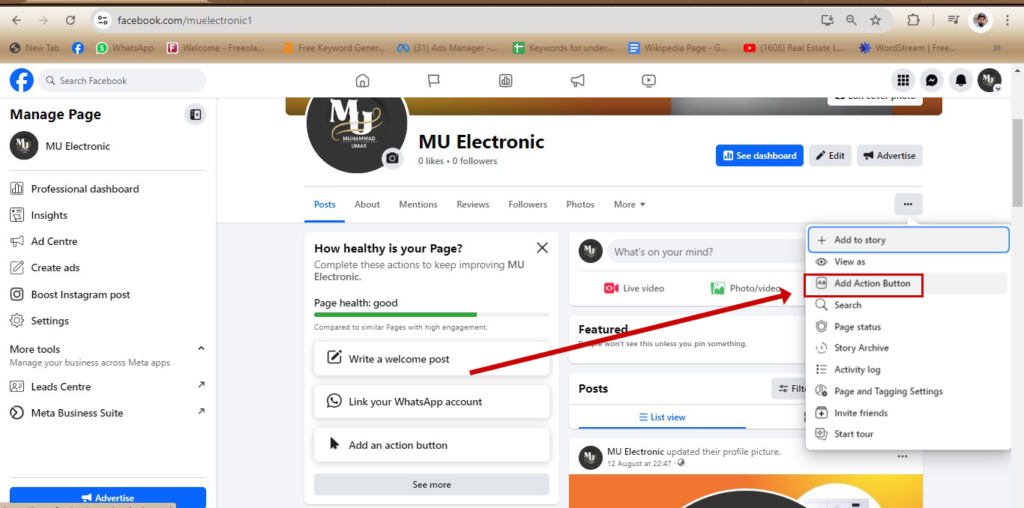
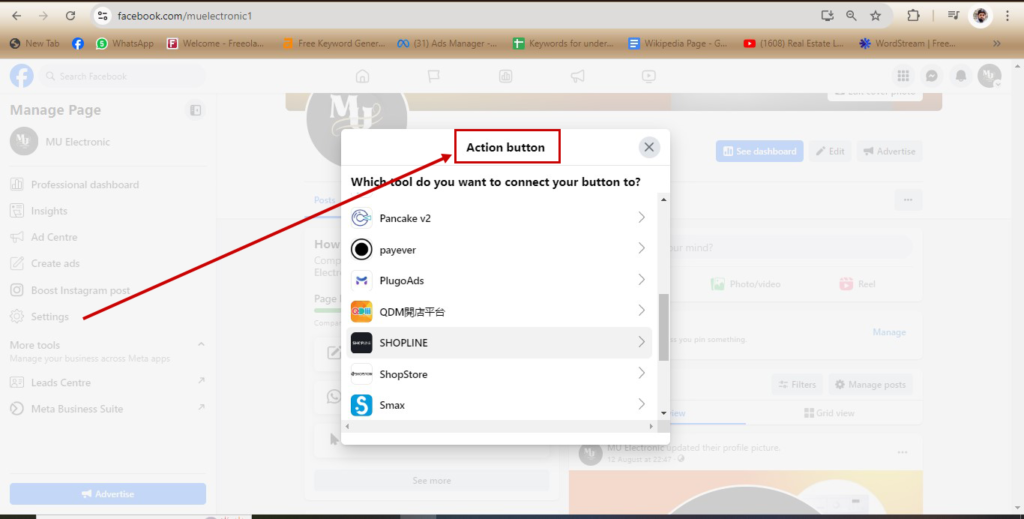
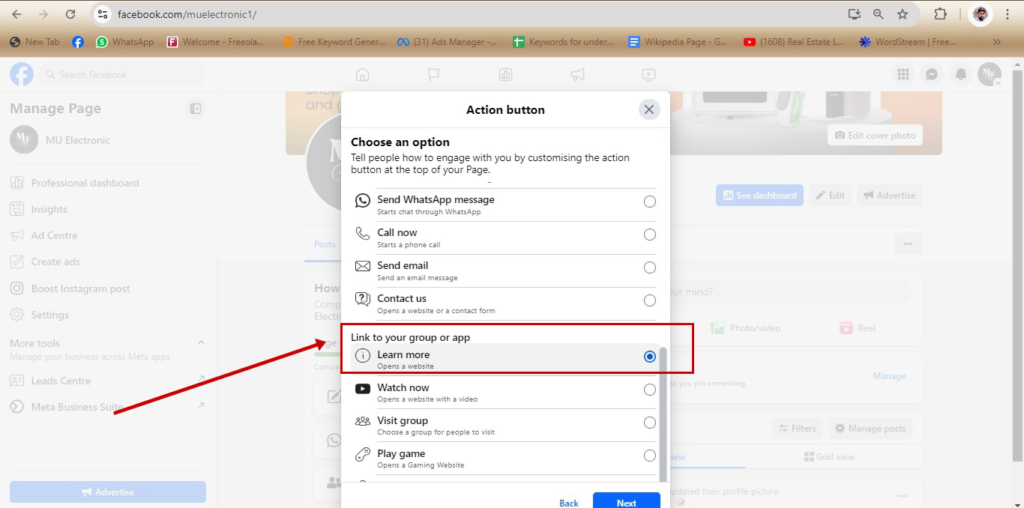
Facebook allows you to add an action button to your page, which encourages interaction from visitors. This button can be customized to suit your page’s purpose, offering options for instance, “Shop Now,” “Call Now,” “Contact Us,” or “Send Message.” To set up an action button:
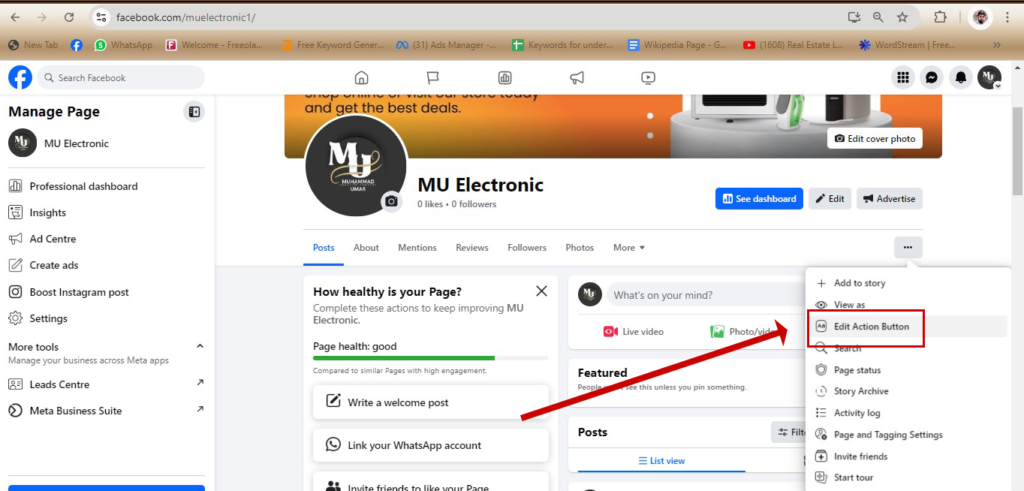
- Click on the “three dots” below your page’s cover photo.
- Choose the button that best aligns with your page’s goals. For an electronic store, “Shop Now” might be the most appropriate.
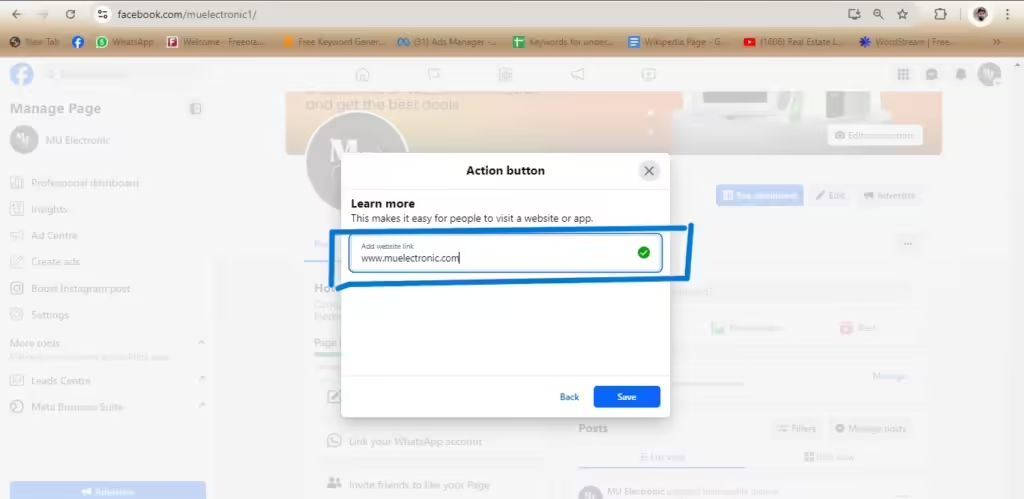
- Enter the relevant URL, such as your website’s shopping page, to direct visitors to the correct destination.
- You can change action button or delete it, by going back to these dots and click on edit action button.
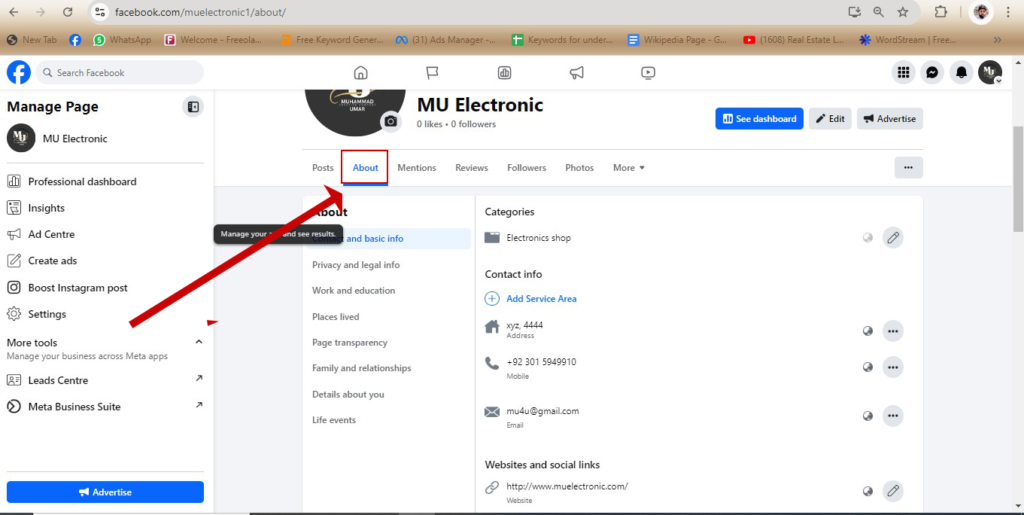
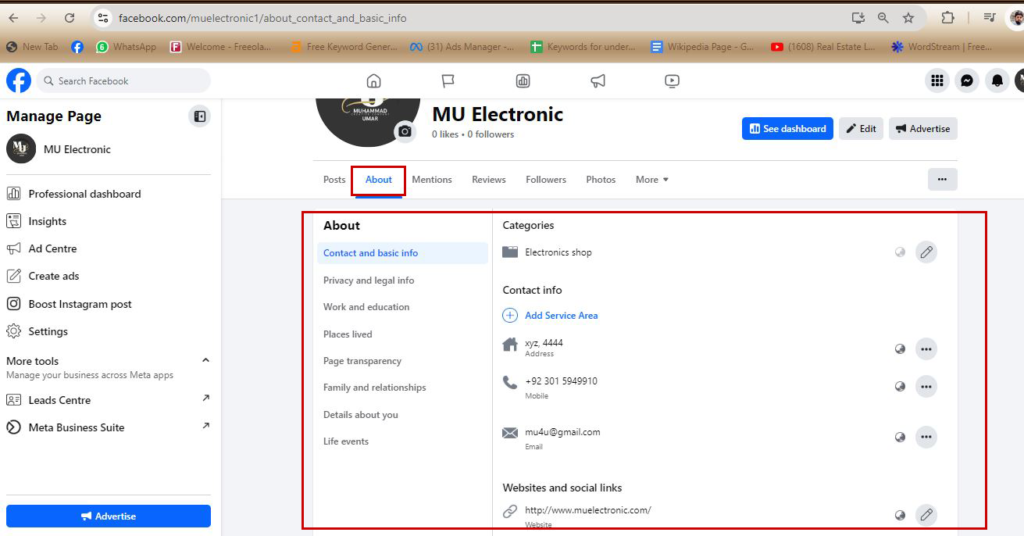
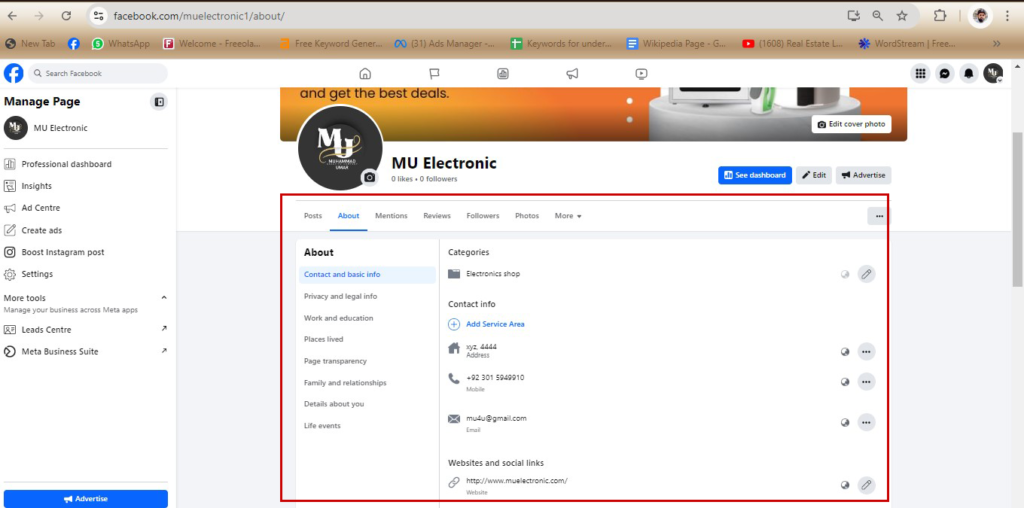
3. About Section
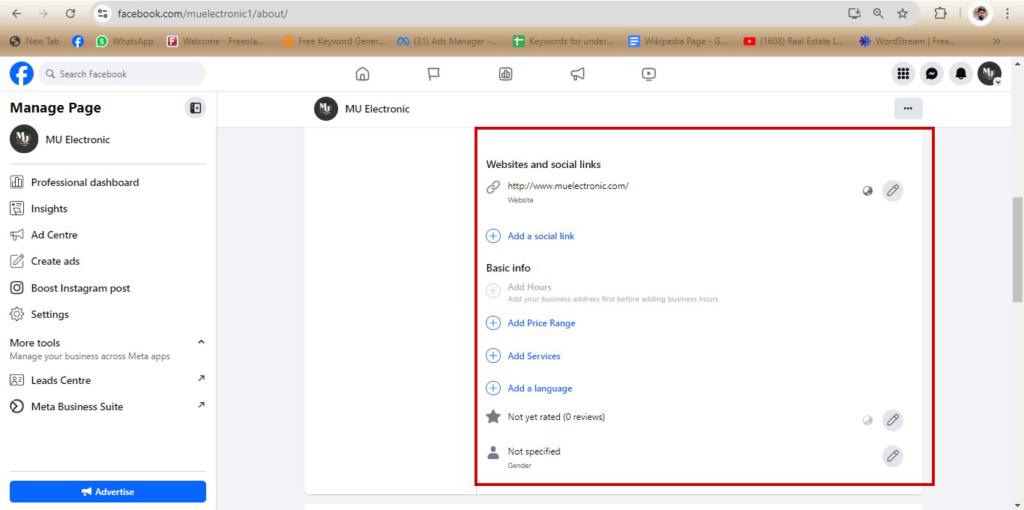
The “About” section is crucial for providing visitors with detailed information about your page. Here, you can add:
- Username: This is the same as the one created earlier, forming part of your page’s identity.
- Description: A brief overview of what your page represents.
- Categories: You can select up to three categories that describe your page. For example, an electronics store might choose “Electronics Store,” “Computer Repair,” and “Shopping & Retail.”
- Contact Information: Add your phone number, and email address, in addition, you can give website link so visitors can easily reach you.
- Location: If you have a physical store, provide your address. If you operate online only, you can select an option indicating that your page doesn’t have a physical location.
- Service Area: Specify the regions where you provide delivery or services if applicable.
- Hours: Indicate your business hours, whether you have set working hours or are always open. You can also note temporary service changes, like during holidays or renovations.
The “About” section is where visitors learn more about your business or organization, making it essential to fill out this section thoroughly.
Advanced Page Settings & Privacy
For those who wish to have more control over their page, Facebook’s advanced settings offer a wide array of options. Access these settings by navigating to the “Settings” menu on the left-hand side of your page. Here are some of the key settings:
1. Preferences
- Reaction preferences
- Notification setting
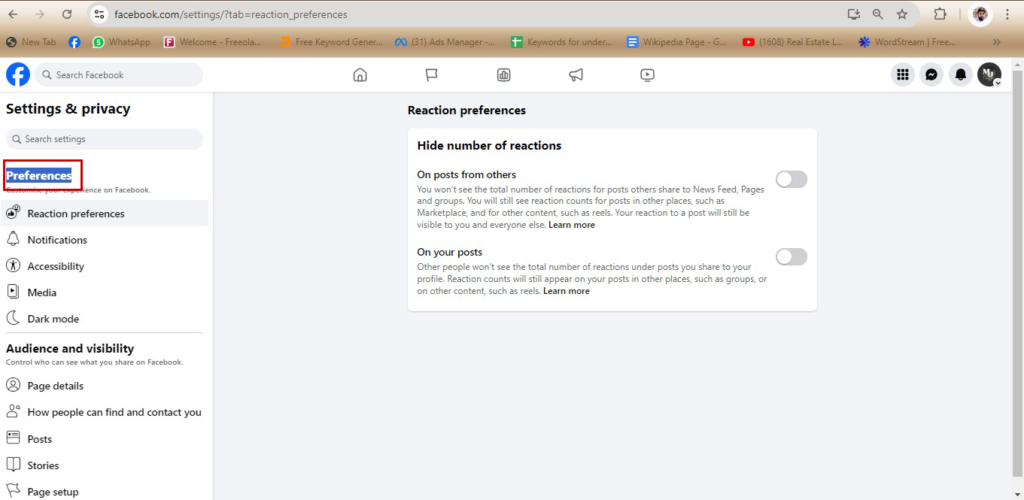
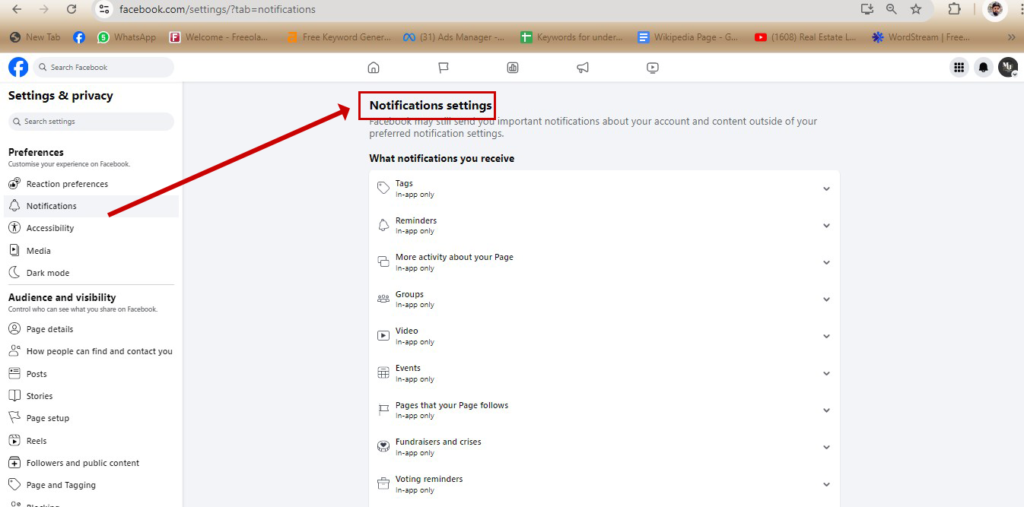
Facebook may still send you important notifications about your account and content outside of your preferred notification settings.
- Accessibility
- Media
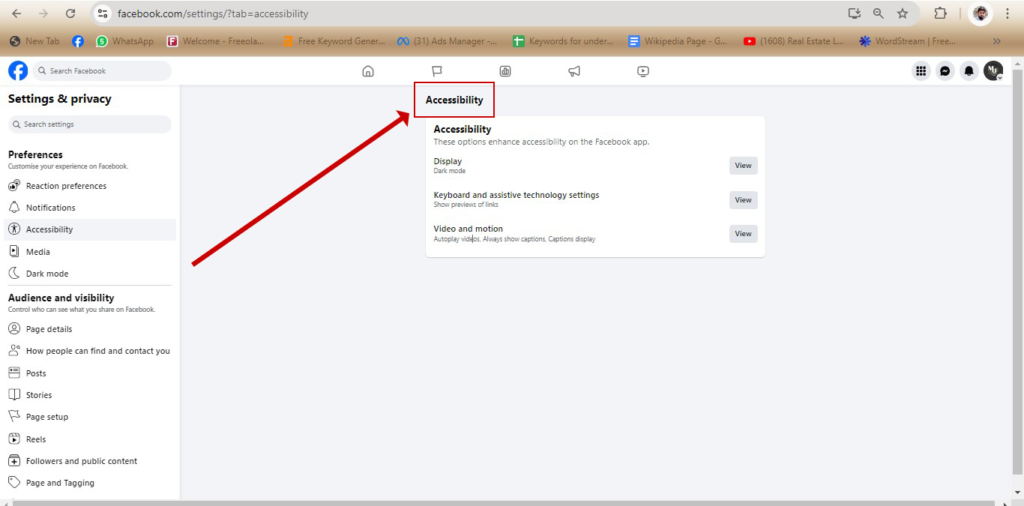
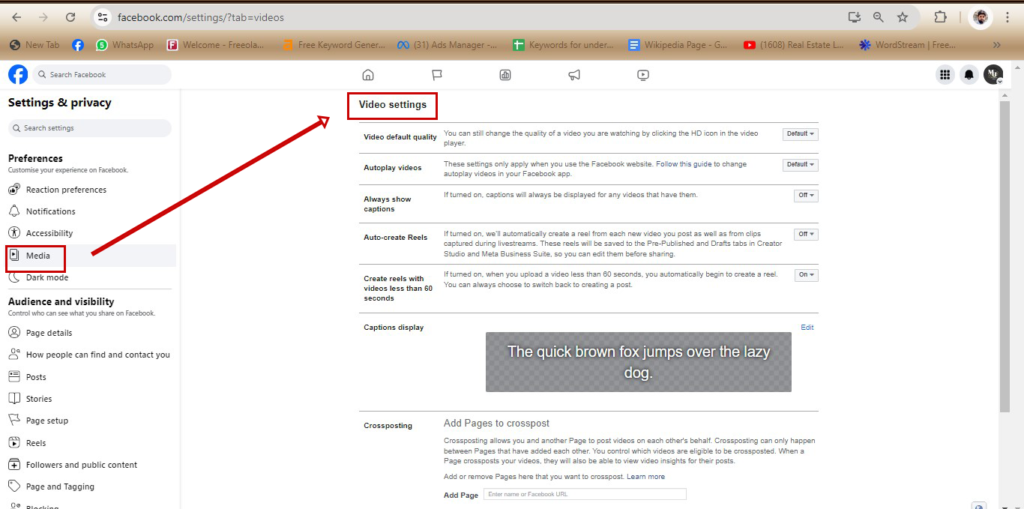
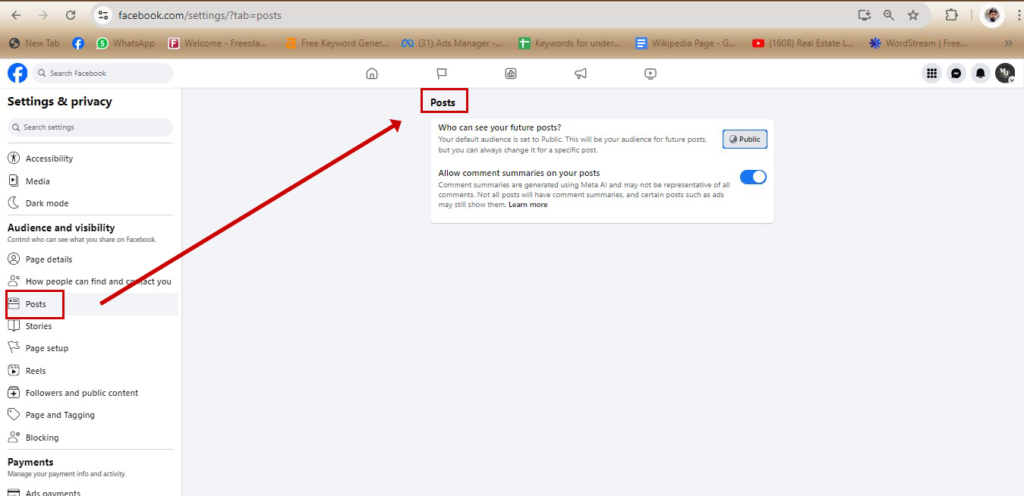
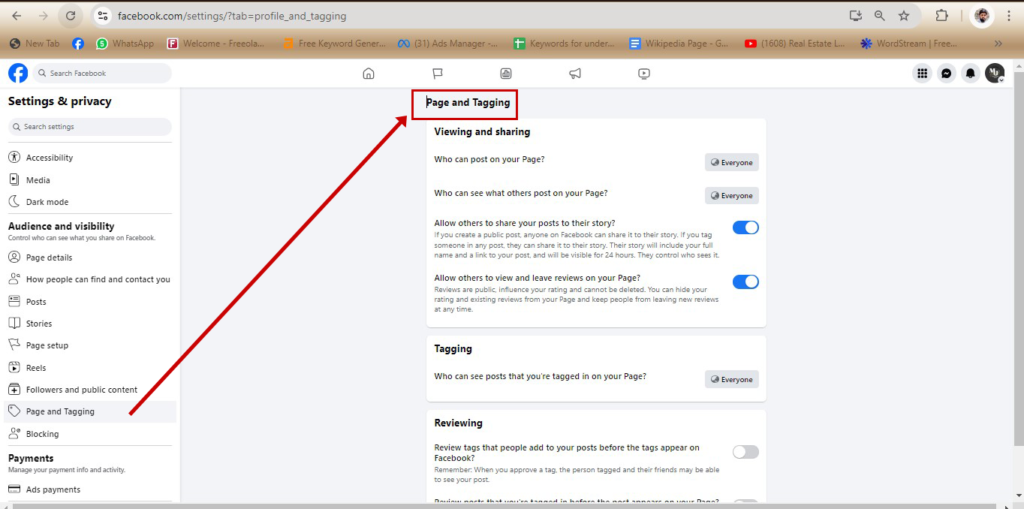
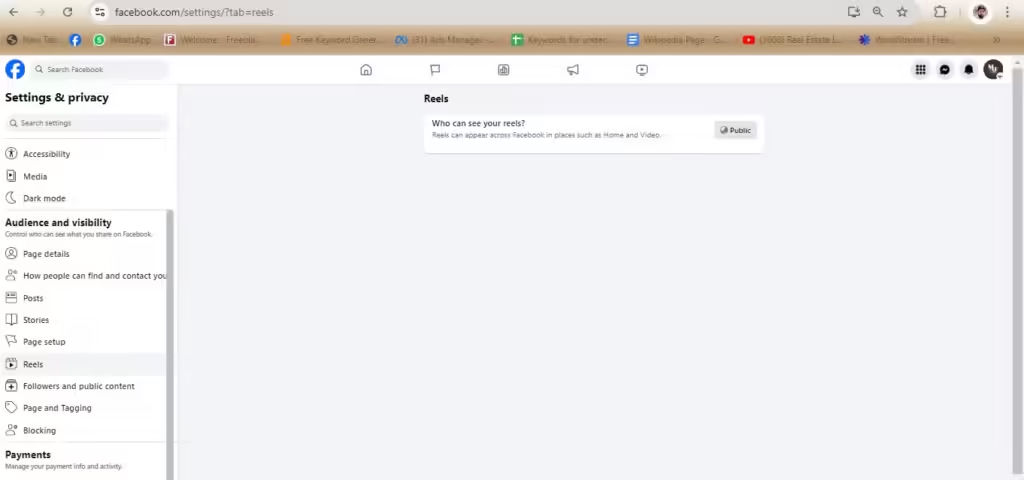
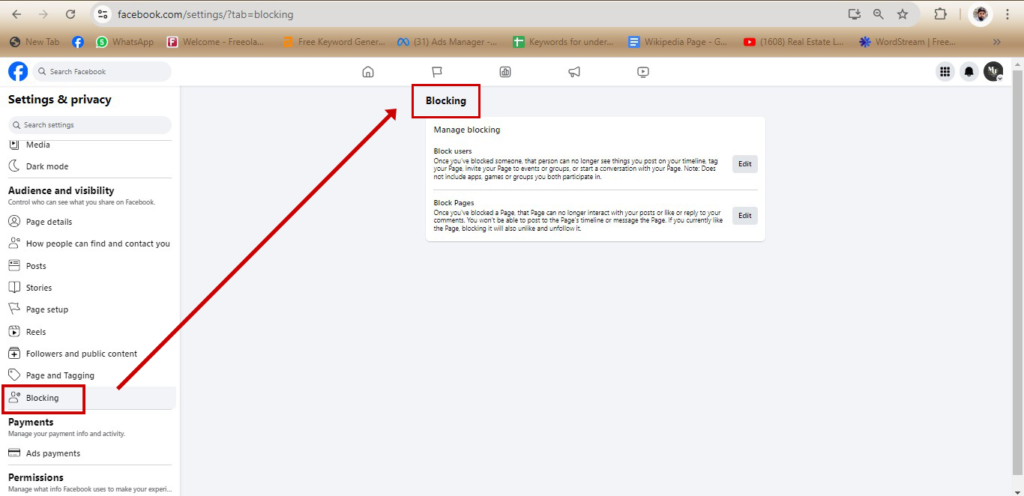
Audience and visibility
- Page details
- How people can find and contact you
- Post and Story Sharing
Setting up and managing your Facebook page involves more than just creating a profile. By understanding and utilizing both the basic and advanced settings, you can create a more effective and user-friendly page. This will not only enhance your page’s functionality but also improve the experience for your audience.
