How to Create a Facebook Business Page. Creating a Facebook page for your business, organization, or community is a powerful way to connect with your audience and establish an online presence. Setting up a Facebook business page is a straightforward process, whether you’re looking to promote your company, share information, or engage with customers. In this guide, we’ll walk you through the steps to create a Facebook page, customize it, and optimize it for success.
Step 1: Log in to Facebook and Access the Facebook Page Setup
To start, log in to your Facebook account. Once you’re on the home page of the Facebook interface, look for the menu on the right side of the screen—it’s represented by 9 dots.
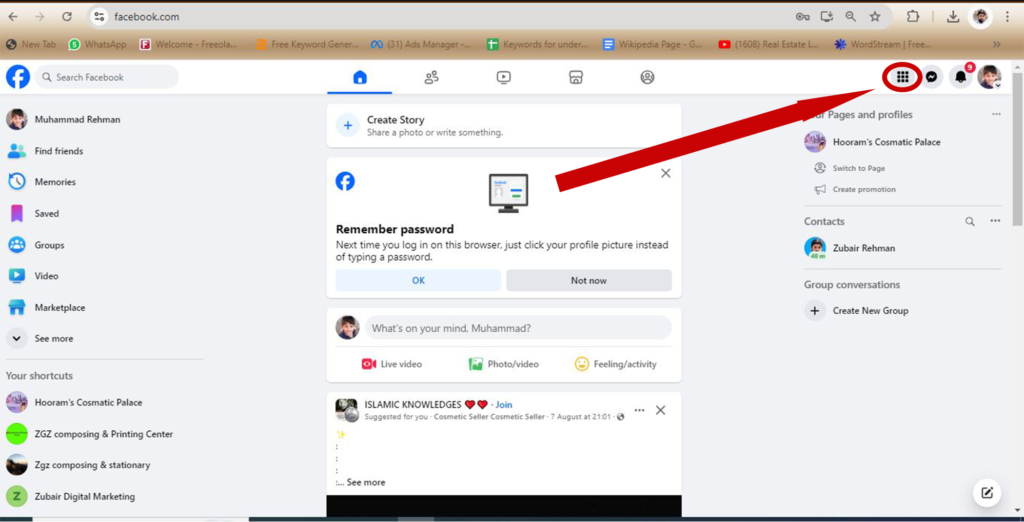
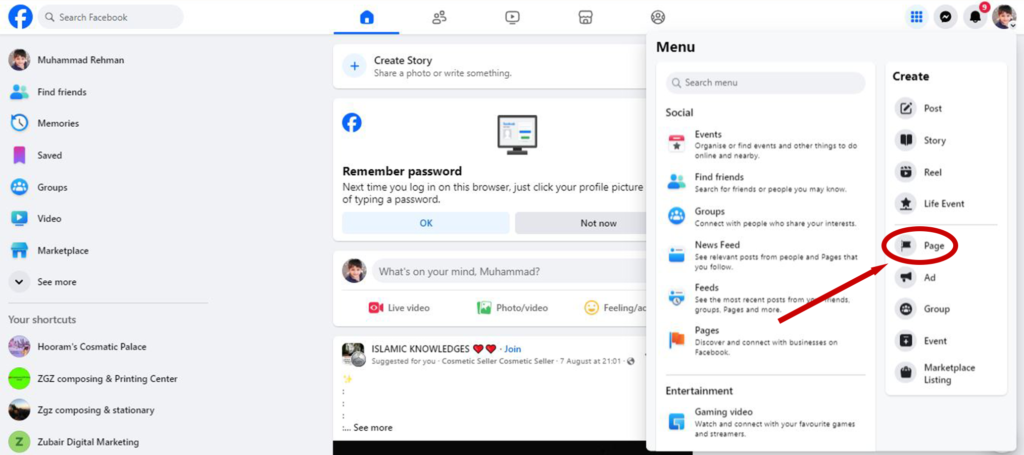
Click on this Facebook menu, and under the “Create” section, select the “Page” option. This is where you’ll begin the process to create a new Facebook page for your company, organization, or business etc.
Step 2: Enter Your Facebook Page Name and Category
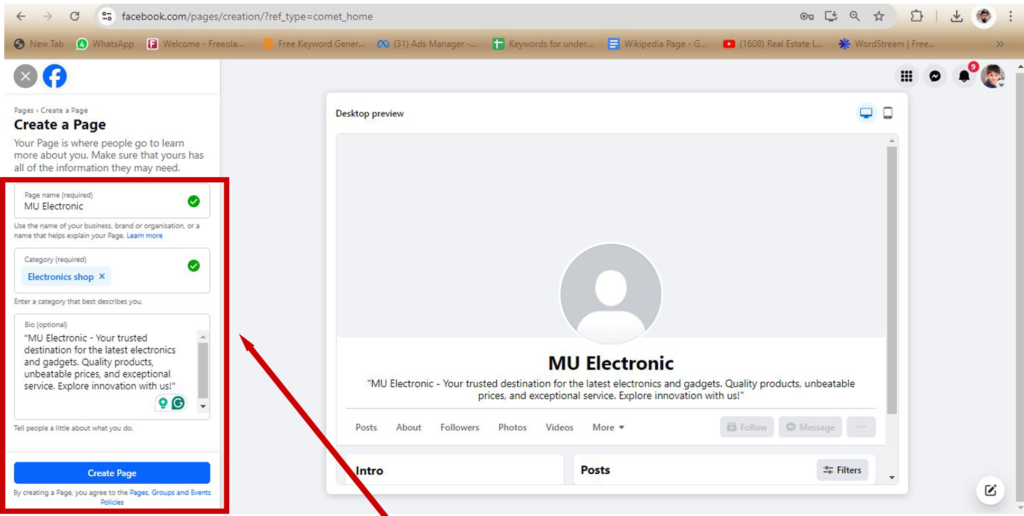
After opening the Facebook page setup interface, the first step is to provide your Facebook page name. This should be the name of your company, organization, or business—something that clearly describes your brand. For instance, if your business is “MU Electronic,” you’d name your page accordingly.
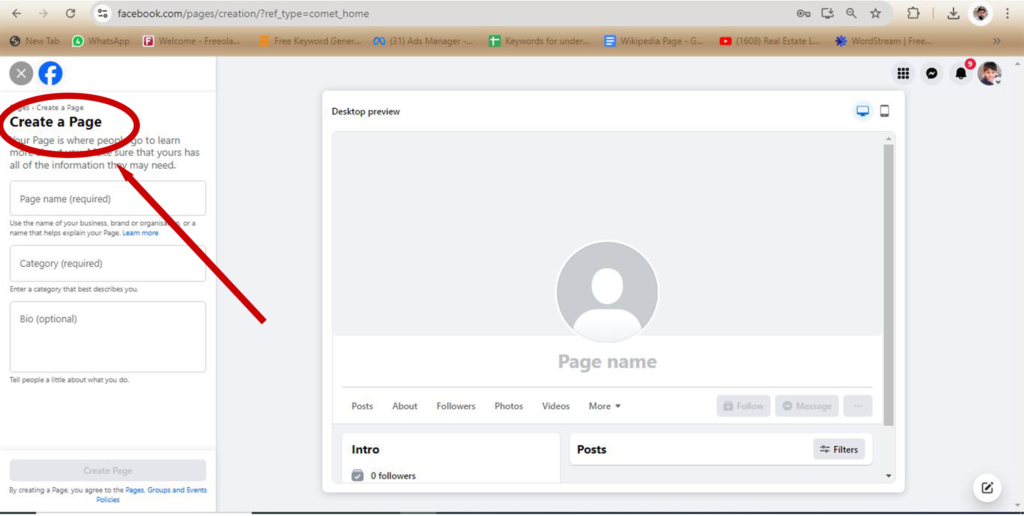
Next, choose the appropriate Facebook page category that relates to your business. Since MU Electronic is an electronics shop, you would select “Electronic Shop” as your category. This step is crucial because it helps Facebook categorize your page, making it easier for people to find you.
Step 3: Add a Bio to Your Facebook Page
In the next section, you’ll have the option to add a Facebook page bio. While this step is optional, it’s highly recommended. A well-crafted bio can tell people about your business and what makes it unique. For instance, for MU Electronic, the bio could be: “MU Electronic – Your trusted destination for the latest electronics and gadgets. Quality products, unbeatable prices, and exceptional service. Explore innovation with us!”
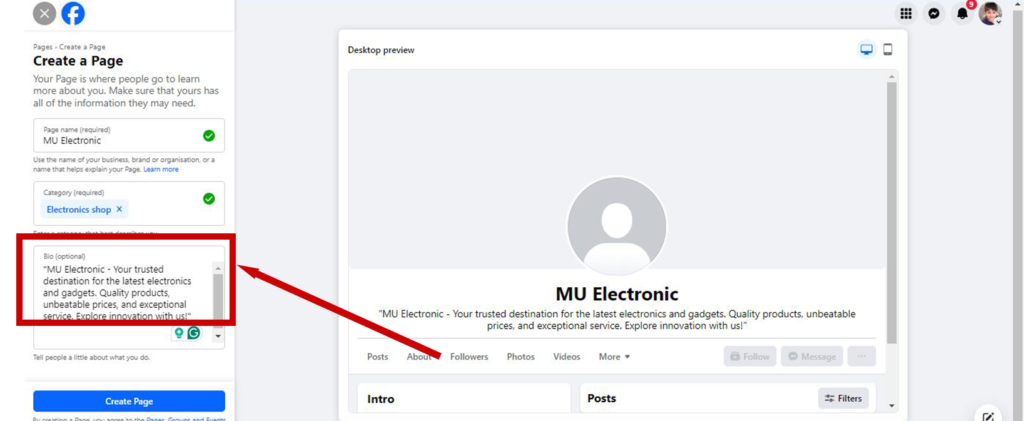
Step 4: Finalize the Facebook Page Creation
Once you’ve filled in the necessary details, you’ll notice that the “Create Page” button on the left side of the screen becomes active. Initially, it may have been inactive, but now that you’ve entered your Facebook page name, category, and bio, you’re ready to proceed. Click “Create Page” to finalize the creation of your Facebook business page.
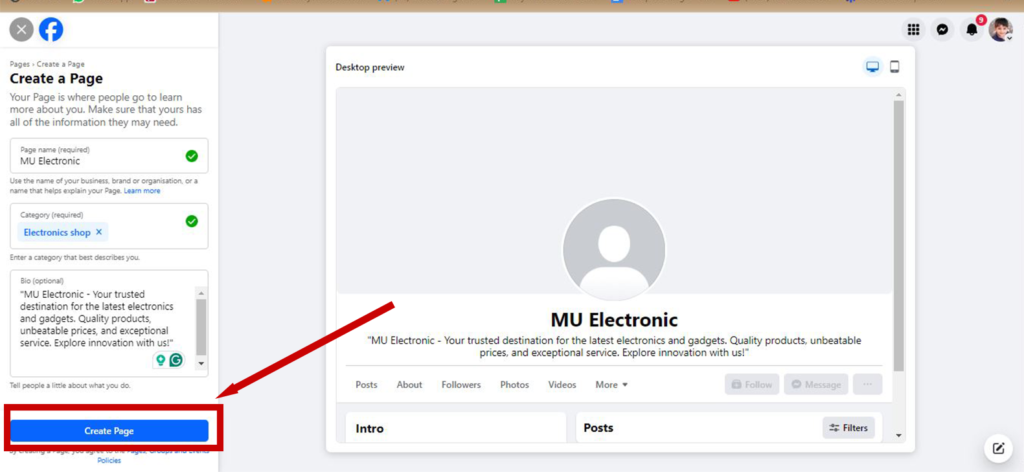
Congratulations! You’ve successfully created your **MU Electronic Facebook page**. Now, it’s time to add more details to help people connect with you and to optimize your page for engagement.
Step 5: Complete Your Facebook Page Setup
After creating your Facebook page, you’ll be prompted to complete additional steps to enhance your page’s functionality and appearance.
1. Contact Information
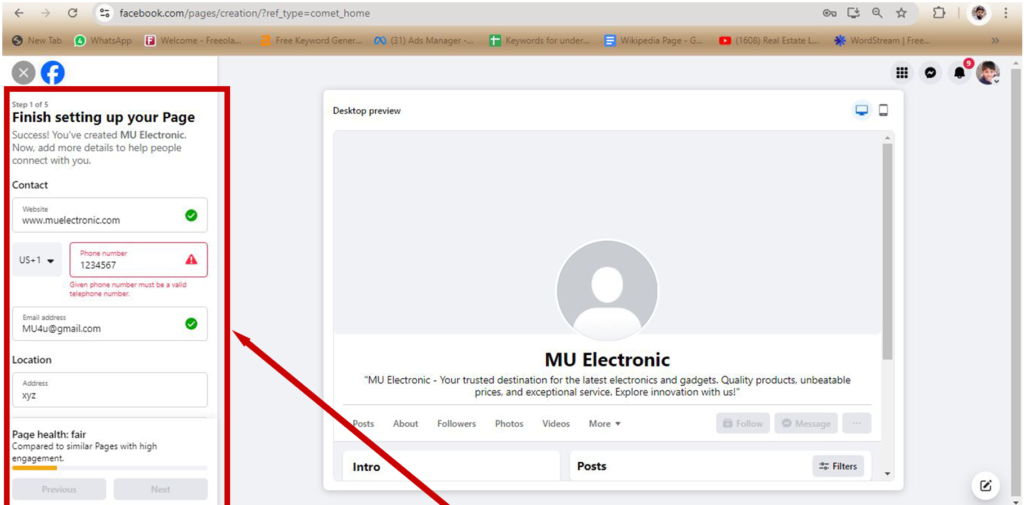
Provide essential contact details for your business, including your website, phone number, email address, and location. This information helps potential customers reach out to you easily. For instance:
Website: www.muelectronic.com
Phone number: 1234567
Email address: MU4u@gmail.com
Location: XYZ
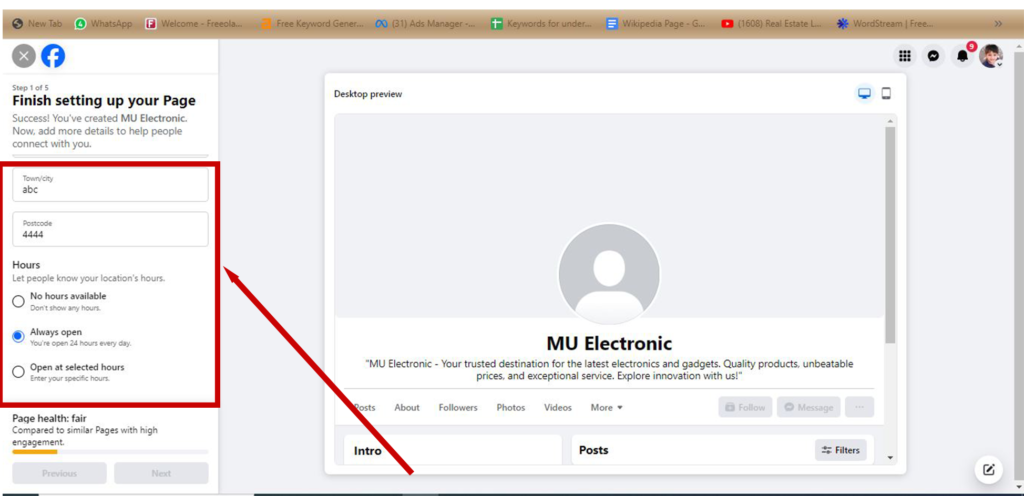
Town/City: ABC
Postcode: 4444
Hours: Specify your business hours. You can choose from options like “No hours available,” “Always open,” or “Open at selected hours.”
2. Customize Your Facebook Page
Add Profile Picture: Upload a profile picture that represents your business. This could be your logo or another image that aligns with your brand identity. Add Cover Photo: Similarly, upload a cover photo that complements your profile picture and adds visual appeal to your page.
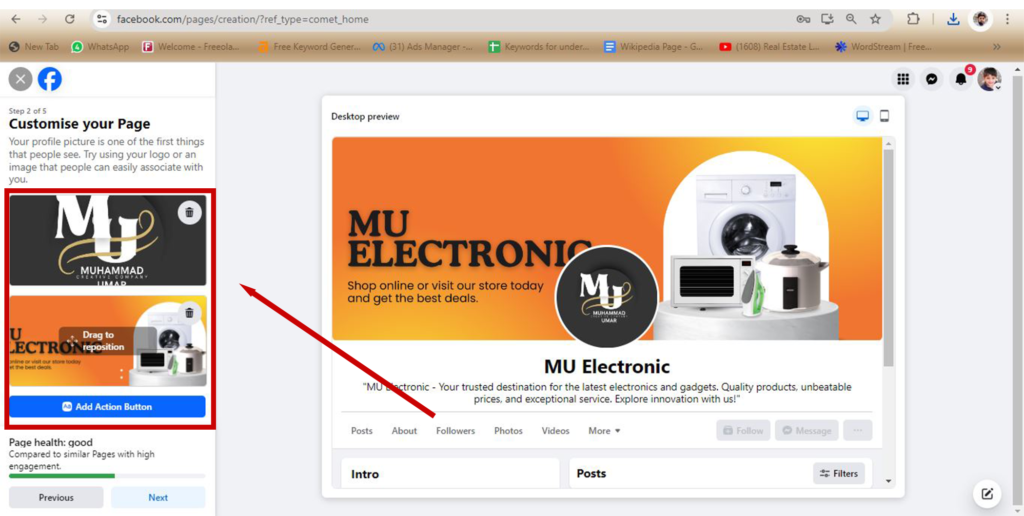
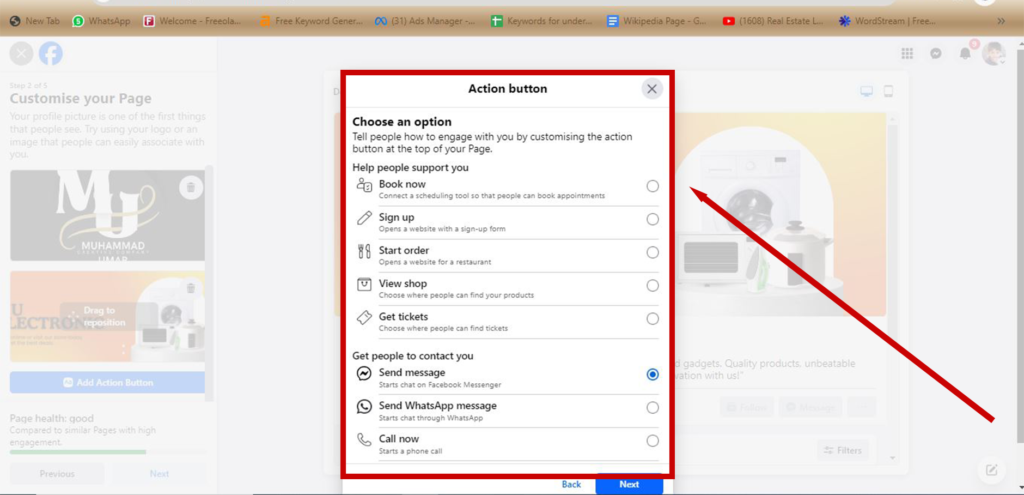
Add Action Button: Customize the action button at the top of your page to guide visitors on how to interact with you. Options include “Book Now,” “View Shop,” “Call Now,” “Shop Now,” “Contact Us,” or providing a link to your website.
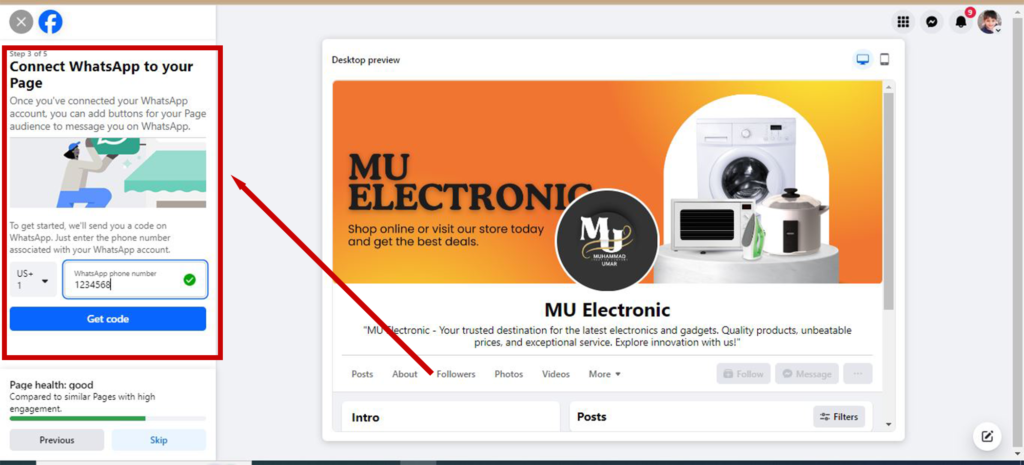
3. Connect WhatsApp to Your Facebook Page
If you use WhatsApp for business, you can connect WhatsApp to your Facebook page. This allows your audience to message you directly on WhatsApp from your page. Simply enter the phone number associated with your WhatsApp account, and you’ll receive a code to verify the connection.
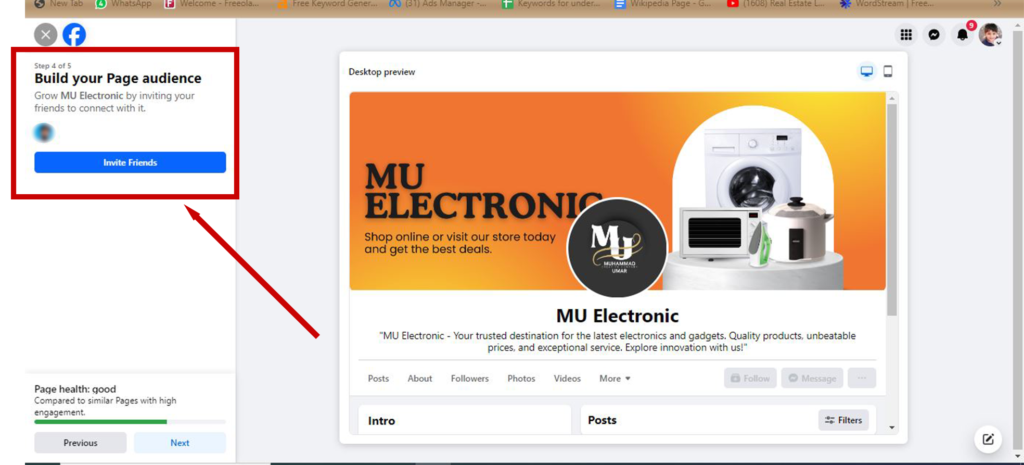
Step 6: Grow Your Facebook Page Audience
Building an audience is essential for the success of your Facebook business page. Start by inviting your friends to like your page. Facebook provides an “Invite Friends” feature that allows you to send invitations to people in your friend list. This can help you quickly gain followers and increase your page’s visibility.
Step 7: Stay Informed About Your Facebook Page
To ensure you’re always up-to-date with your page’s performance and notifications, turn on Facebook page notifications. These can be activated directly on your profile, allowing you to receive real-time updates even when you’re not actively managing your page. Additionally, you can opt-in for Facebook marketing and promotional emails to learn about Meta products and services that can help grow your business.
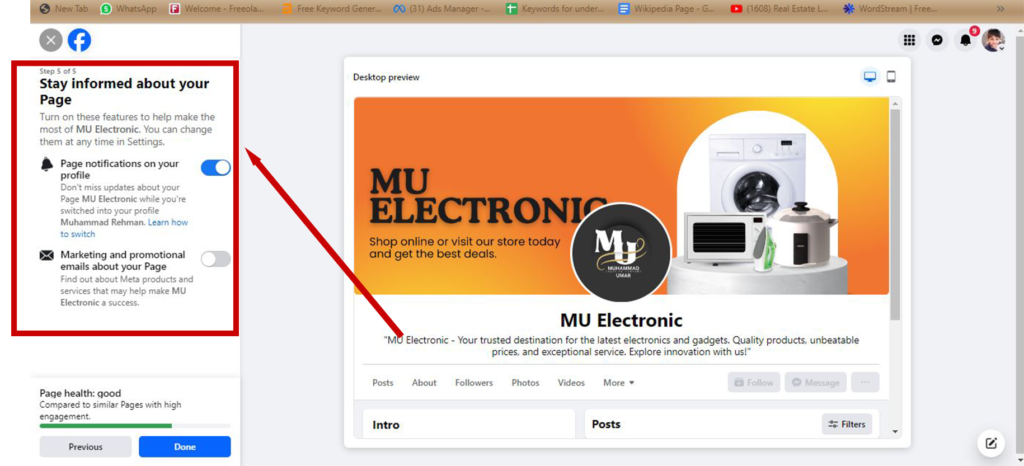
Finalizing Your Facebook Page Setup
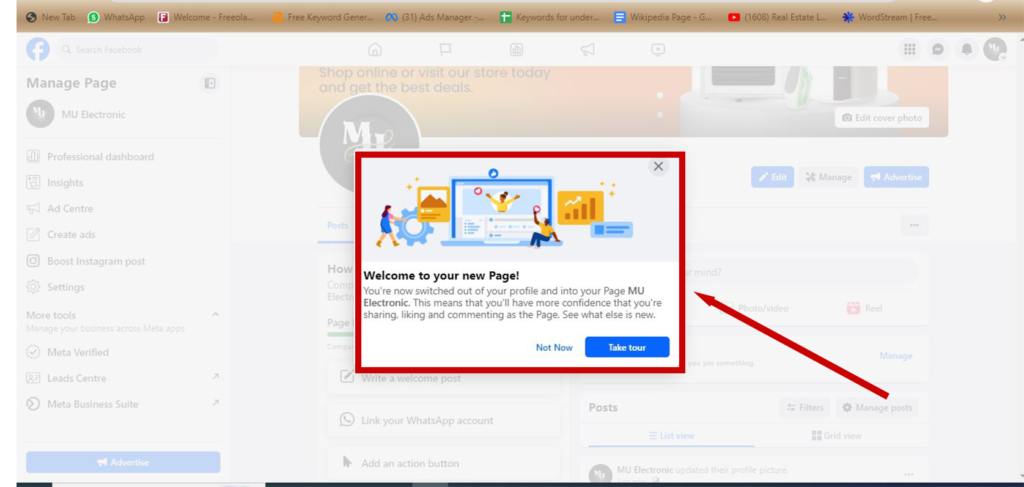
Once you’ve completed all the necessary steps, click “Done” on the left side of the screen. This will save your settings and take you to your newly created page. You’ll see a notification that says, “Welcome to your new page.”
By following these steps, you can successfully create and customize a Facebook page that represents your business and engages your audience. Whether you’re promoting a small local shop like MU Electronic or a larger organization, a well-optimized Facebook page can significantly enhance your online presence and help you connect with customers effectively.

2 Comments
An outstanding blog
Thank you for your kind words.