
Introduction – How to Create a tables in Figma easily?
What is Figma? How to create a Tables in Figma easily? Welcome to the world of Figma, a powerhouse tool for UX/UI designers that makes collaboration and design feel like a breeze.
Whether you’re a seasoned designer or a beginner, learning how to effectively utilize Figma can significantly enhance your workflow. Today, we’re diving deep into one of its useful features: creating tables. Tables are fundamental in design for organizing information clearly and efficiently.
Let’s get started on how to create a table in Figma, step-by-step process:
Step 1: Set Up Your Figma File
Before we dive into table creation, ensure you have a Figma account and are logged in.

Create a new file by clicking on the “+” icon on the dashboard.

For the purposes of this guide, name your file something relevant like “Practice Table.”

Step 2: Draw the Table Frame
Select the ‘Frame Tool’ (F key) from the sidebar.
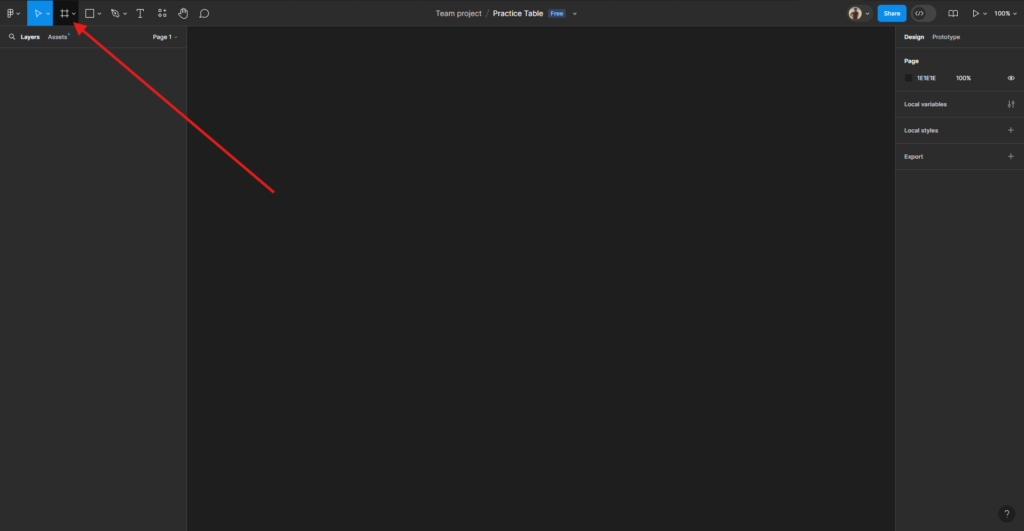
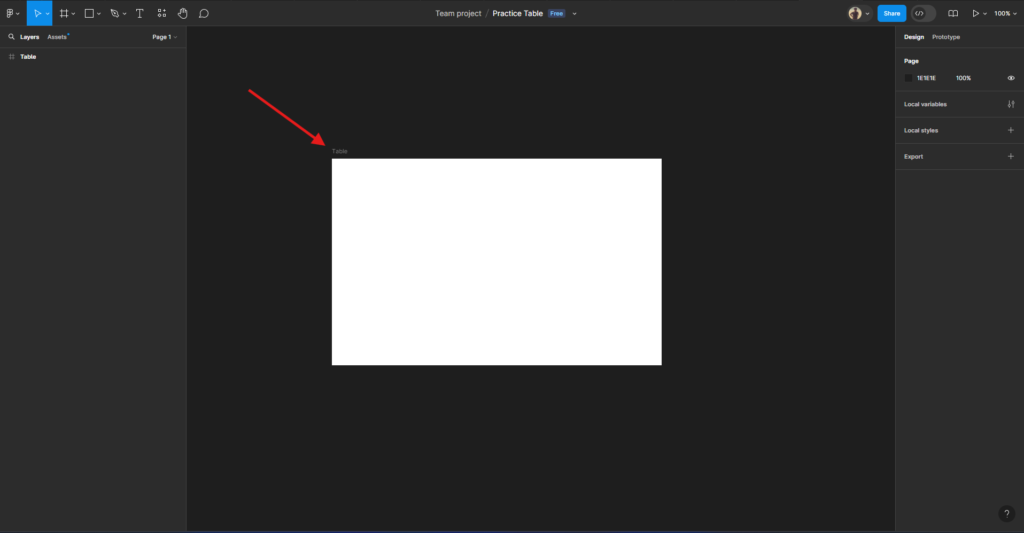
Click and drag on the canvas to draw a frame that will serve as the outer boundary of your table.
Give your frame a name like ‘Table’ as a result for easy identification.
Step 3: Add Columns and Rows
Use the ‘Text Tool’ (T key) to type the first cell heading in the top-left corner of your frame.
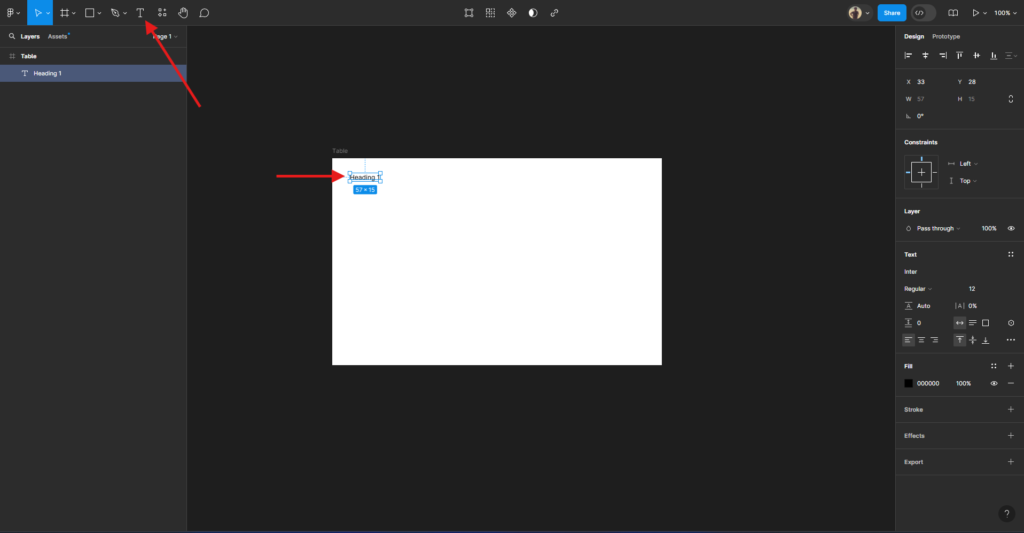
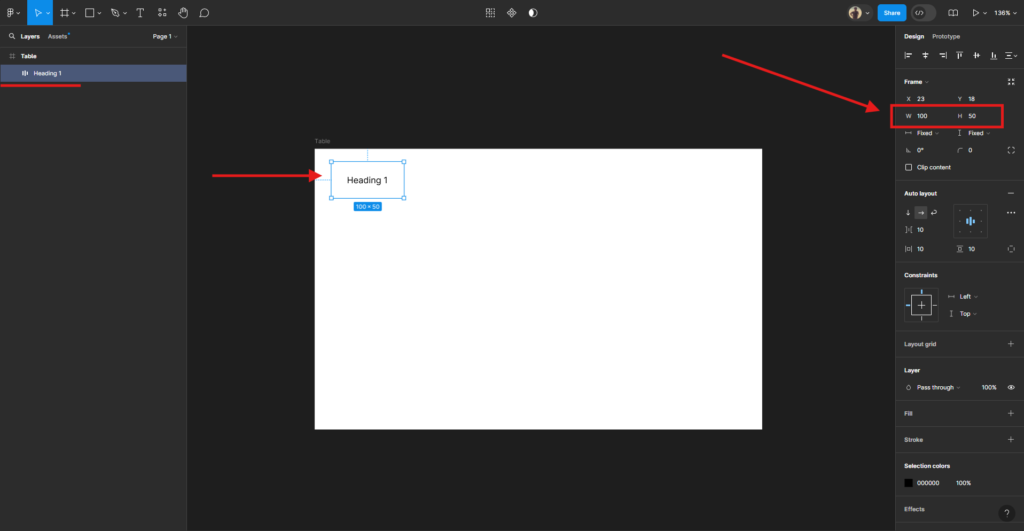
Convert the text ‘Heading 1’ to a frame by pressing ‘Shift + A’ and rename the frame title to ‘Heading 1’.
Set the dimensions in the right-side properties panel (for instance: 100px x 50px for width and height).
Give the bottom thin outline to the cell and duplicate the first cell. Drag the duplicate to the bottom to create your first column and repeat the duplication process to create multiple cells at bottom of your column header.
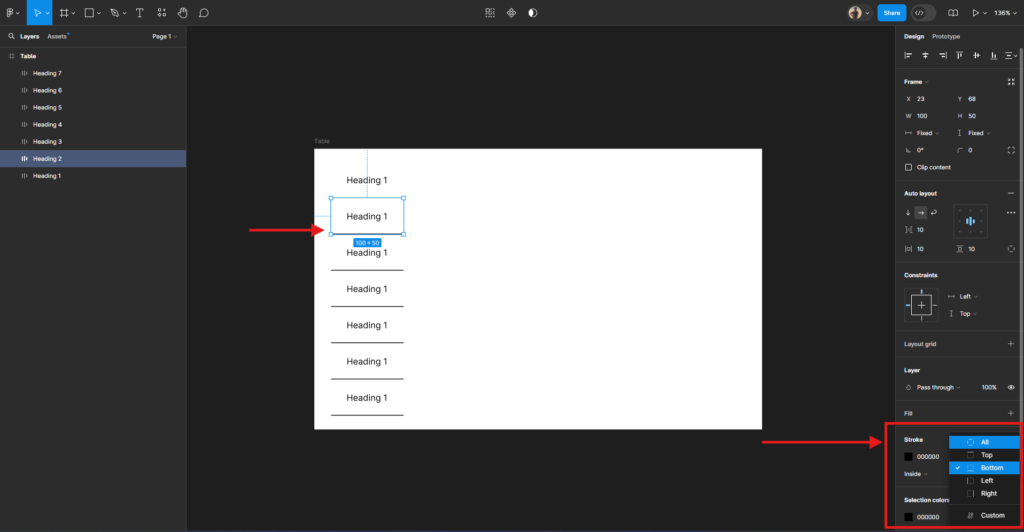
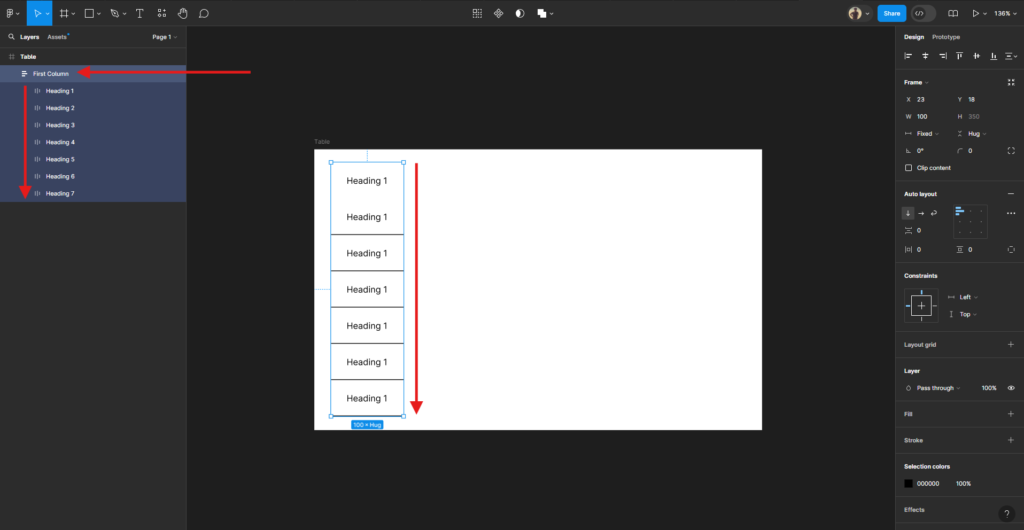
Select all the cell either from left side panel OR press Shift + Select cell on the canvas.
Convert into a frame again by pressing Shift + A and rename the frame to “First Column” for example showing in the image below.
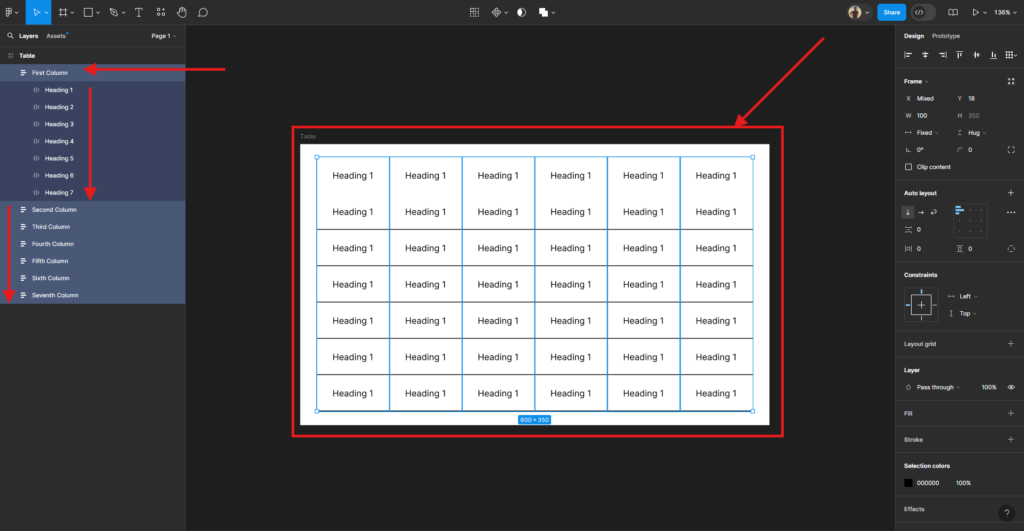
Duplicate the ‘First Column’ frame to right to fill the table canvas.
Now the image is showing that each column has their own data. Also give the name to each column as per your need. We’ll modify the text later.
Step 4: Style Your Cells
Now, we have the table layout where we can give a style i.e. Color and Modification of Text.
Modify your heading text as per your need.
In this Example we are using simple user data (e.g. First Name, Last Name, Phone Number, Email Address, Profession, City, and Postal Code.
By editing your text press Ctrl + Double Click on ‘On the Text’ you want to change.
Click on a cell to select it and use the properties panel to change the fill color, add borders, or adjust the border radius for rounded corners.
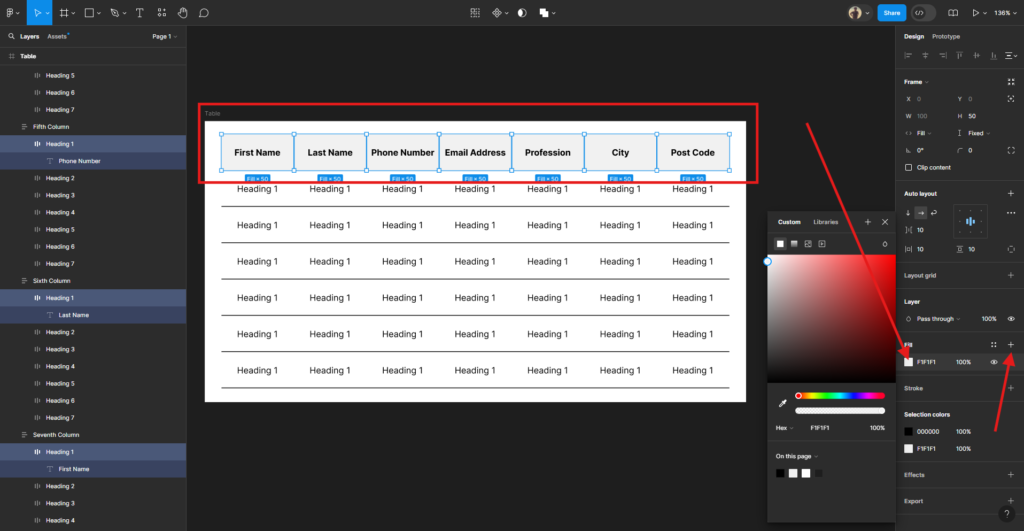
As a result of this method your table will be align and neat.
Congratulations! With this blog ‘How to create a table in Figma Easily?’ you have just created a fully functional table in Figma. First, experiment with different styles and configurations to best display your data. Additionally, remember that practice makes perfect. So, keep exploring Figma’s capabilities to continuously enhance your designs. In fact, every adjustment and modification you make not only improves your current project, but also improves your overall design skills. So, embrace this journey of learning with enthusiasm and creativity!
One of my UI of Table in Figma take Table UI Design as an instance, where you can create a copy, explore and play-around.
Final Words – About how to create a Table in Figma Easily?
In this blog ‘how to Create a tables in Figma easily?’ Learning Figma with Soft Learn Hub can truly transform your design journey, and here’s why. First, Figma stands out as a powerful tool in the realm of digital design, offering flexibility and collaboration features unmatched by many others.
Additionally, by starting your Figma education with Soft Learn Hub, you benefit from expertly prepared tutorials and real-time support that facilitate a deeper understanding of the software and faster mastery. Additionally, the interactive learning environment ensures that you can practice as you learn, consolidating concepts and techniques into practice.
Consequently, this experience not only boosts your confidence but also your portfolio, making you a stronger candidate for professional opportunities. So, grab the opportunity to enhance your skills and creativity with Soft Learn Hub; It is an investment in your future that promises substantial returns.
